
A how to guide for configuring table shipping rates in Magento
Table rates can easily bridge the gap between the native free shipping option or flat rate option in Magento. Table rates are fairly easy to configure if you know how. The hardest part is finding the damn option in the admin panel to download the .csv file. This little tutoral guide will help you configure a basic table rate.
Login to your admin panel
Got to the System tab, then select configuration option
Now scroll down to the sales left side menu SALES and select Shipping Methods
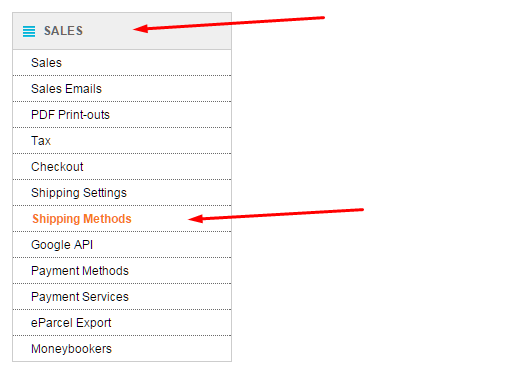
Select the accordian section header Table Rates
Most likely you will not see the export CSV button in the Table rates section. 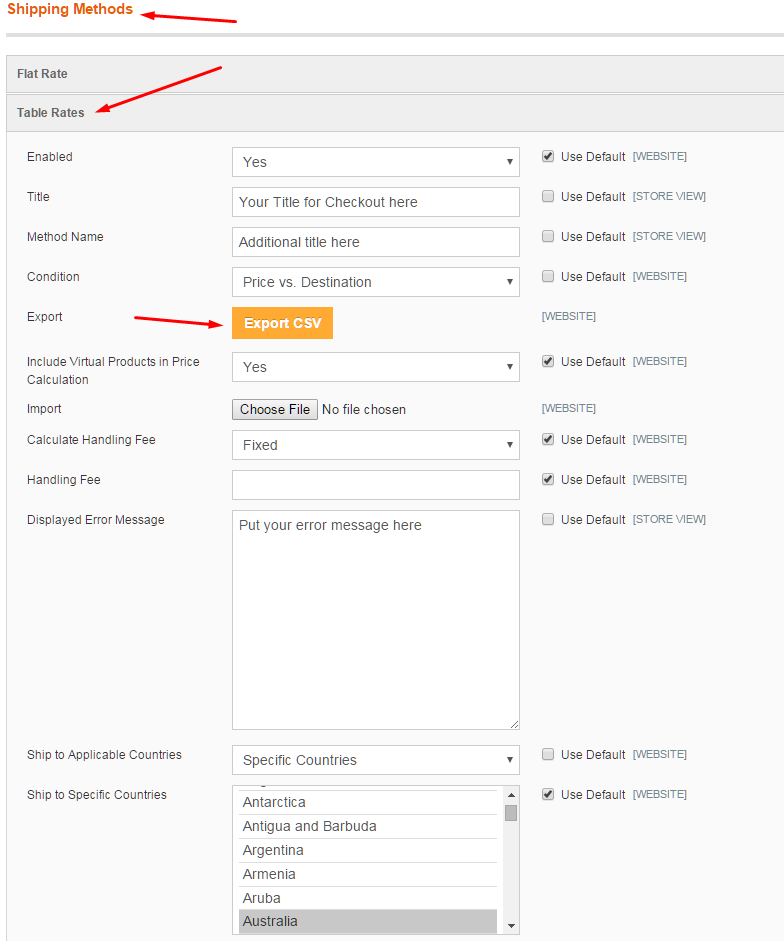
This is the section where most people give up. Don’t dispear it is just one of those ‘you gotta know magento to magento’ situations. The secret to setting up table rates is selecting the correct store!
At the top of the system->configuration page is this drop down
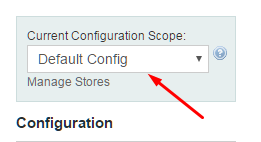
If you have a single store operating you normally have to select the main dropdown option, but sometimes templates or custom setups are different so try each option until you find the one that matches the correct store. When you have the correct store selected you will see the export csv button. You’ll need to select whether you are going to configure a price vs destination, weight vs destination or # of items vs destination. Once you have selected you condition you can export the CSV and this will give you a file you can load in to excel or notepad and edit.
I won’t go into every option as it is pretty self explantory. ( Note: My example CSV is loaded in MS Excel. You can use notepad or similar) 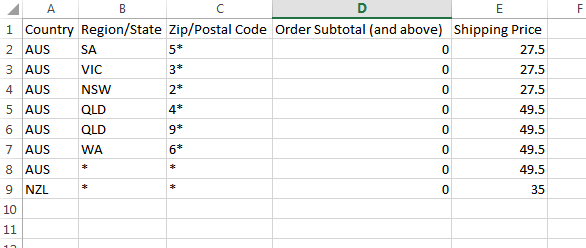 Here are some basics for a Simple Australian shipping setup, but they will apply to any country.
You need to either use your variable (shipping can be further restricted in the admin panel by restricting which countries can view the shipping option). Or if you wish to restrict the options you need to enter the country code. You can find a table we made up for them here.
For Australia entering the state is more than enough. I would suggest that if you need to refine it more you are probably configuring shipping rates which are excessively complex. if you are somewhere like the USA, where rural and metro can vary greatly you’ll need to spend sometime working through the differences.
Pretty straight forward for Australia. I added the extra variable to allow for anything outside the listed states.
In Australia there are few differences when shipping metro or rural so a Variable or first number for the post card is often enough. If you require a difference simply add the extra postal codes in full or partial.
This is especially useful if you want to do free shipping over a certain dollar spend, which is common these days. Our example doesn’t have this, but if add free shipping over $100 spend it would look something like this
Row 1 AUS, SA, 5, 0-99, $27.50
Row 2 AUS, SA, 5, 100, $0.00
Row 3 AUS, VIC, 5, 0-99, $27.50
Row 4 AUS, VIC, 5, 100, $0.00
Whatever goes here is what will be charged.
Save this as an CSV file and upload to the correct shipping option and save. Then go and test it many times before making it live.
Some tips
I like simple shipping so users can work out the rules easily. This is why we have just used the first number of each post code. You can write a row/rule for each postcode or region if you wish (note: beware QLD it uses 9* for post centres). Here is a handy website for working out all the postcode in Australia for free here. You could also just use the states and an astrix in the postcode column, but I like that extra check.